I sincerely hope you've enjoyed a hearty Thanksgiving with friends and family (if you celebrate), and are now ready for some you-time, perhaps even including some sewing. With the recent release of my "Harvest" quilt pattern, I'm now feeling ready to embrace all that is winter, which is almost upon us, by offering another FREE printable page of 1" hexagons. "Winter Wonderland" is the theme, and the above photo provides a glimpse. In the right side bar you'll find a link for the FREE PDF. Available in the shop are pre-printed card stock pages just like those shown above, and are mailed as whole sheets. 28 inspiring hexis per page.
"Winter Wonderland" hexis really add something special to your hand work. Evoking cherished memories, these words are meant to keep you feeling all the warm fuzzies all season long. Share these with an EPP friend! You can download the FREE PDF and print on your own printer, have your local copy shop print on card stock, or order them already printed in my shop. I hope you'll enjoy using them for your next EPP project, big or small!
To make the Striped Hexis shown in these photos, check out the tutorial below.
The annual Black Friday SALE is on right now!
The entire shop is 20% off now through Monday. This is the time to pick up stocking stuffers for your stitchy friends, or treats for yourself! NEW: Dye kits! The entire shop is brimming with exquisite products chosen and dyed with your stitching experience in mind, offering you only the best!
Contact me with any questions. Happy shopping!
If you're interested in making the Striped Hexis shown in the sample above, here's a quick tutorial:
Step 1: Arrange your paper hexis into sets of seven per flower. I've used my "Winter Wonderland" cardstock hexis, but any paper hexis will do nicely. Choose two contrasting color fabrics and a background fabric. Fat quarters or scraps are great choices. For one flower, cut one 1-1/4" x 15" strip for the interior stripe, and one 1-3/4" x 15" strip for the exterior stripe. Use approximately 2.5"x2.5" squares for the center hexi and background hexis.
Step 2: Place the two contrasting strips right sides together and align edges on one 15" side, shown in photo. Stitch 1/4" seam allowance. Press seam open for minimal bulk when basting and sewing.
Step 3: Cut the sewn strip into six sections, each 2-1/2" long.
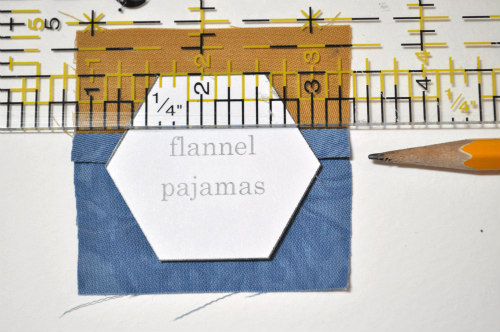
Step 4: Take one paper hexi and measure 1/2" down from an edge, draw a line across the paper as shown. Lay the paper on a fabric section and align the drawn line exactly over the seam line. Trim the fabric, leaving 1/4" seam allowance around all sides of the hexi. Keeping the drawn line and seam line aligned, glue or thread baste each hexi.
Step 5: Baste the center hexi. Lay out all of your hexis as shown. Sew your hexis together in your preferred method of stitching. Baste and layout the background hexis according to your project. Stitch them to the center flower.
Finally, layer, quilt and trim your piece as desired. Add a binding, and if it's a gift, consider adding a label on the back.
What will you do with your Striped Hexis?! We'd all love to see: #tierneybarden


