

At last, we've reached the final post about the making of my art quilts recently shown at Squam Art Workshops.
While the previous five quilts focused largely on their story telling element, this quilt's story is in its making. Enjoy a closer look at Resplendent's inception, techniques and artistry. For the complete view of "My Enchanted Wonderland" installation, please click here.

Resplendent, 2018
Title: Resplendent, 44.5" x 46.5"
Materials: Naturally dyed organic cotton sateens, commercial cottons, metallic and cotton threads; two layers wool batting
Techniques: English Paper Piecing, hand and machine piecing, fused applique, hand quilting
Date: June 2017 - May 2018
re-splend-ent, adjective
attractive and impressive through being richly colorful or sumptuous
Looking back over the months that this quilt was being made, I can honestly say that resplendent is the best word to adequately convey how I felt through the entire process, including how I felt when I saw it finished for the first time. From the initial design idea, to fabric choices, exploring paper shape combinations, cutting paper for the center medallion, and hand piecing and quilting - at every stage, I felt a sort of inner radiance mixed with thrill and eagerness to keep going.
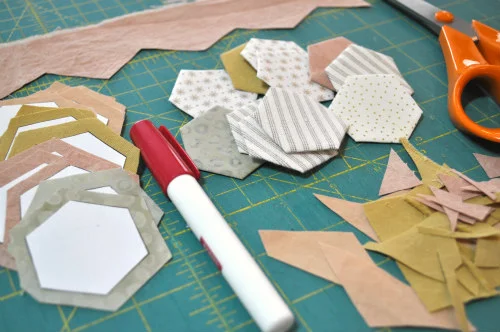
1" hexis cut from paper and wrapped with fabric. I'm a fan of glue basting.
In the beginning, this quilt was intended as an attempt to satisfy my curiosity about medallion quilts (their history, variety of quilt components and assembly methods). At the same time, I had been anxious to start an English Paper Piecing (EPP) project using my naturally dyed fabrics. Just at the early stages of designing this quilt, Elizabeth Duvivier invited me to teach at the June '18 session of Squam Art Workshops. We had discussed paper cutting being a large part of the class, and then with a little more play time and sample making, I bridged paper cutting to fabric by way of fused applique - more on that a little later in this post - but it's important to note this time of play was a key moment in the planning of the workshop, as well as the evolution of this quilt. Lesson: make more time to play.
First things first, I began the process of making Resplendent by cutting piles and piles of 1" paper hexagons. I also pulled a stack of my naturally dyed silks and cottons in colors that I see around me every day during summer months. I laid them out to create a transition from light to dark and noticed darker greens were needed, but because they aren't in my standard dye palette, I turned to Nancy Rink's New Aged Muslins by Marcus Fabrics. Feeling the need for a little bit of visual texture, I brought in just a few batiks, and a stripe by Moda and stars by Andover.

EPP hexis being sewn into units before being sewn together to create the center panel of the quilt.

Making the most of every piece of fabric, especially my hand dyed indigo.

A few of the jewel shape paper pieces used in the outer border being wrapped and glue basted.

One unit of many forming the outermost border. The center diamonds are all lovely, soft shades of peaches and pinks from my dye pots.
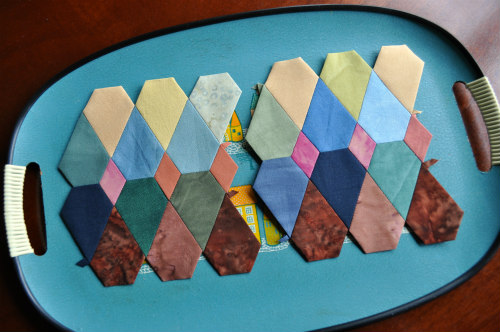
A tray made transporting the English Paper Piecing units much easier!
I chuckle when I recall how I used to think sewing by hand must take ages! Having done a bit of hand sewing before embarking on this quilt, I knew that with an efficient set up (tools, posture, support, etc.), hand work actually moves right along. Stitching one color and shape to the next is satisfying, relaxing and enjoyable. I'll even admit to finding it slightly addicting. Sewing EPP is like solving a puzzle - as soon as you put two pieces together you can't wait to see the next piece put in place, and the next!
Speaking of puzzle pieces, once the center panel and outer borders pieces were stitched together, the four outermost corners were in need of a solution. They presented a fun design challenge, for example, I knew I wanted the colors to flow around each corner, keep the eye moving and maintain a coherent design, but I also had to keep in mind that a paper cut design would be applied over this space, so how not to compete with that design? Below are photos of my solution, and with that portion completed, I moved on to the paper cut motifs.

A corner in need of a solution.

One half of the corner unit.

One half of the corner unit meeting up with the border.

Two corner units sewn together, inner border added.
In the quilt world, there exist a few applique methods. I tend to do a lot of needle turn applique, of which you can see an example here, here and here, but when it comes to my paper cut designs I find fused applique to be the most appropriate method. Generally, if it can be drawn and cut, it can be fused. It's a fairly simple process, and any one can use this technique with beautiful results. I enjoy sharing the technique with fellow creatives, not just quilters, and you can see the work of talented Squam students in my Instagram feed here.

On the left is a paper cut that didn't quite hit the mark for Resplendent's center medallion. I must have cut four or five different designs, fine tuning each time, getting closer to what I felt was just right.

The final paper cut design ready for transfer to fusible web, which had already been adhered to fabric. When cutting, I first get my head in the right place: patience, steadiness and staying in the flow.

The paper cut design is cut and turned over to the right side.

Fusing the center medallion onto the quilt top. Tiny, sharp scissors trim any stray threads before fusing.

Once the quilt top is completely assembled, at last, all of the paper pieces can be removed! Aa a mountain of paper pieces grows, one can see the wisdom in reusing papers.

The assembled quilt top, paper pieces removed, and the entire top pressed. The next steps include layering the batting and backing, basting, machine quilting the paper cut motifs, hand quilting the rest, and then binding.
The day to begin Resplendent's hand quilting was memorable. It was 7:00AM on Saturday May 19th, 2018, and I was in my Nest with fresh hot coffee to my left and my small wooden tool bowl on my right, and the TV was airing Prince Harry and Meghan Markle's wedding. There was one specific moment after the ceremony when a reporter commented that this wedding was "resplendent". I could hardly believe my ears. Of all the adjectives to describe the wedding, he chose the word I had named the very quilt I was stitching. Without slowing, my needle simply continued to weave glinting gold metallic thread through all the layers, holding them together for a lifetime.

Big stitch hand quilting, detail. Metallic thread and Aurifil cotton thread.
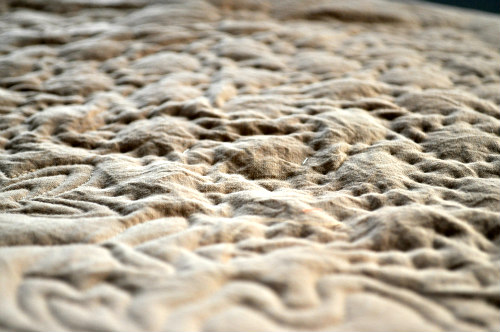
A view of the back of the quilt. Topography comes to mind.

One last look, Resplendent surrounded by Specimen (L) and New York Beauty (R)
How's that for a fairytale ending? Thank you all for the time you have taken to read my posts about this special body of work. I value your interest and your feedback. Many of you have been so kind to share your own reactions and thoughts with me, and I've sincerely enjoyed those conversations.
A heartfelt thank you goes out once again to Elizabeth Duvivier @elizabethduvivier and Meg Fussell @squamlove for the opportunity to produce and show this body of work, as well as their support. This has been an epic stitched journey and I've enjoyed every single moment. I remain open to traveling with this show, and would appreciate any potential locations/events you may know of.
Please continue to share your questions and comments below or by email: tierneybarden@gmail.com. I read them all. You can also follow my natural dye works and daily life on Instagram @tierneybarden.