
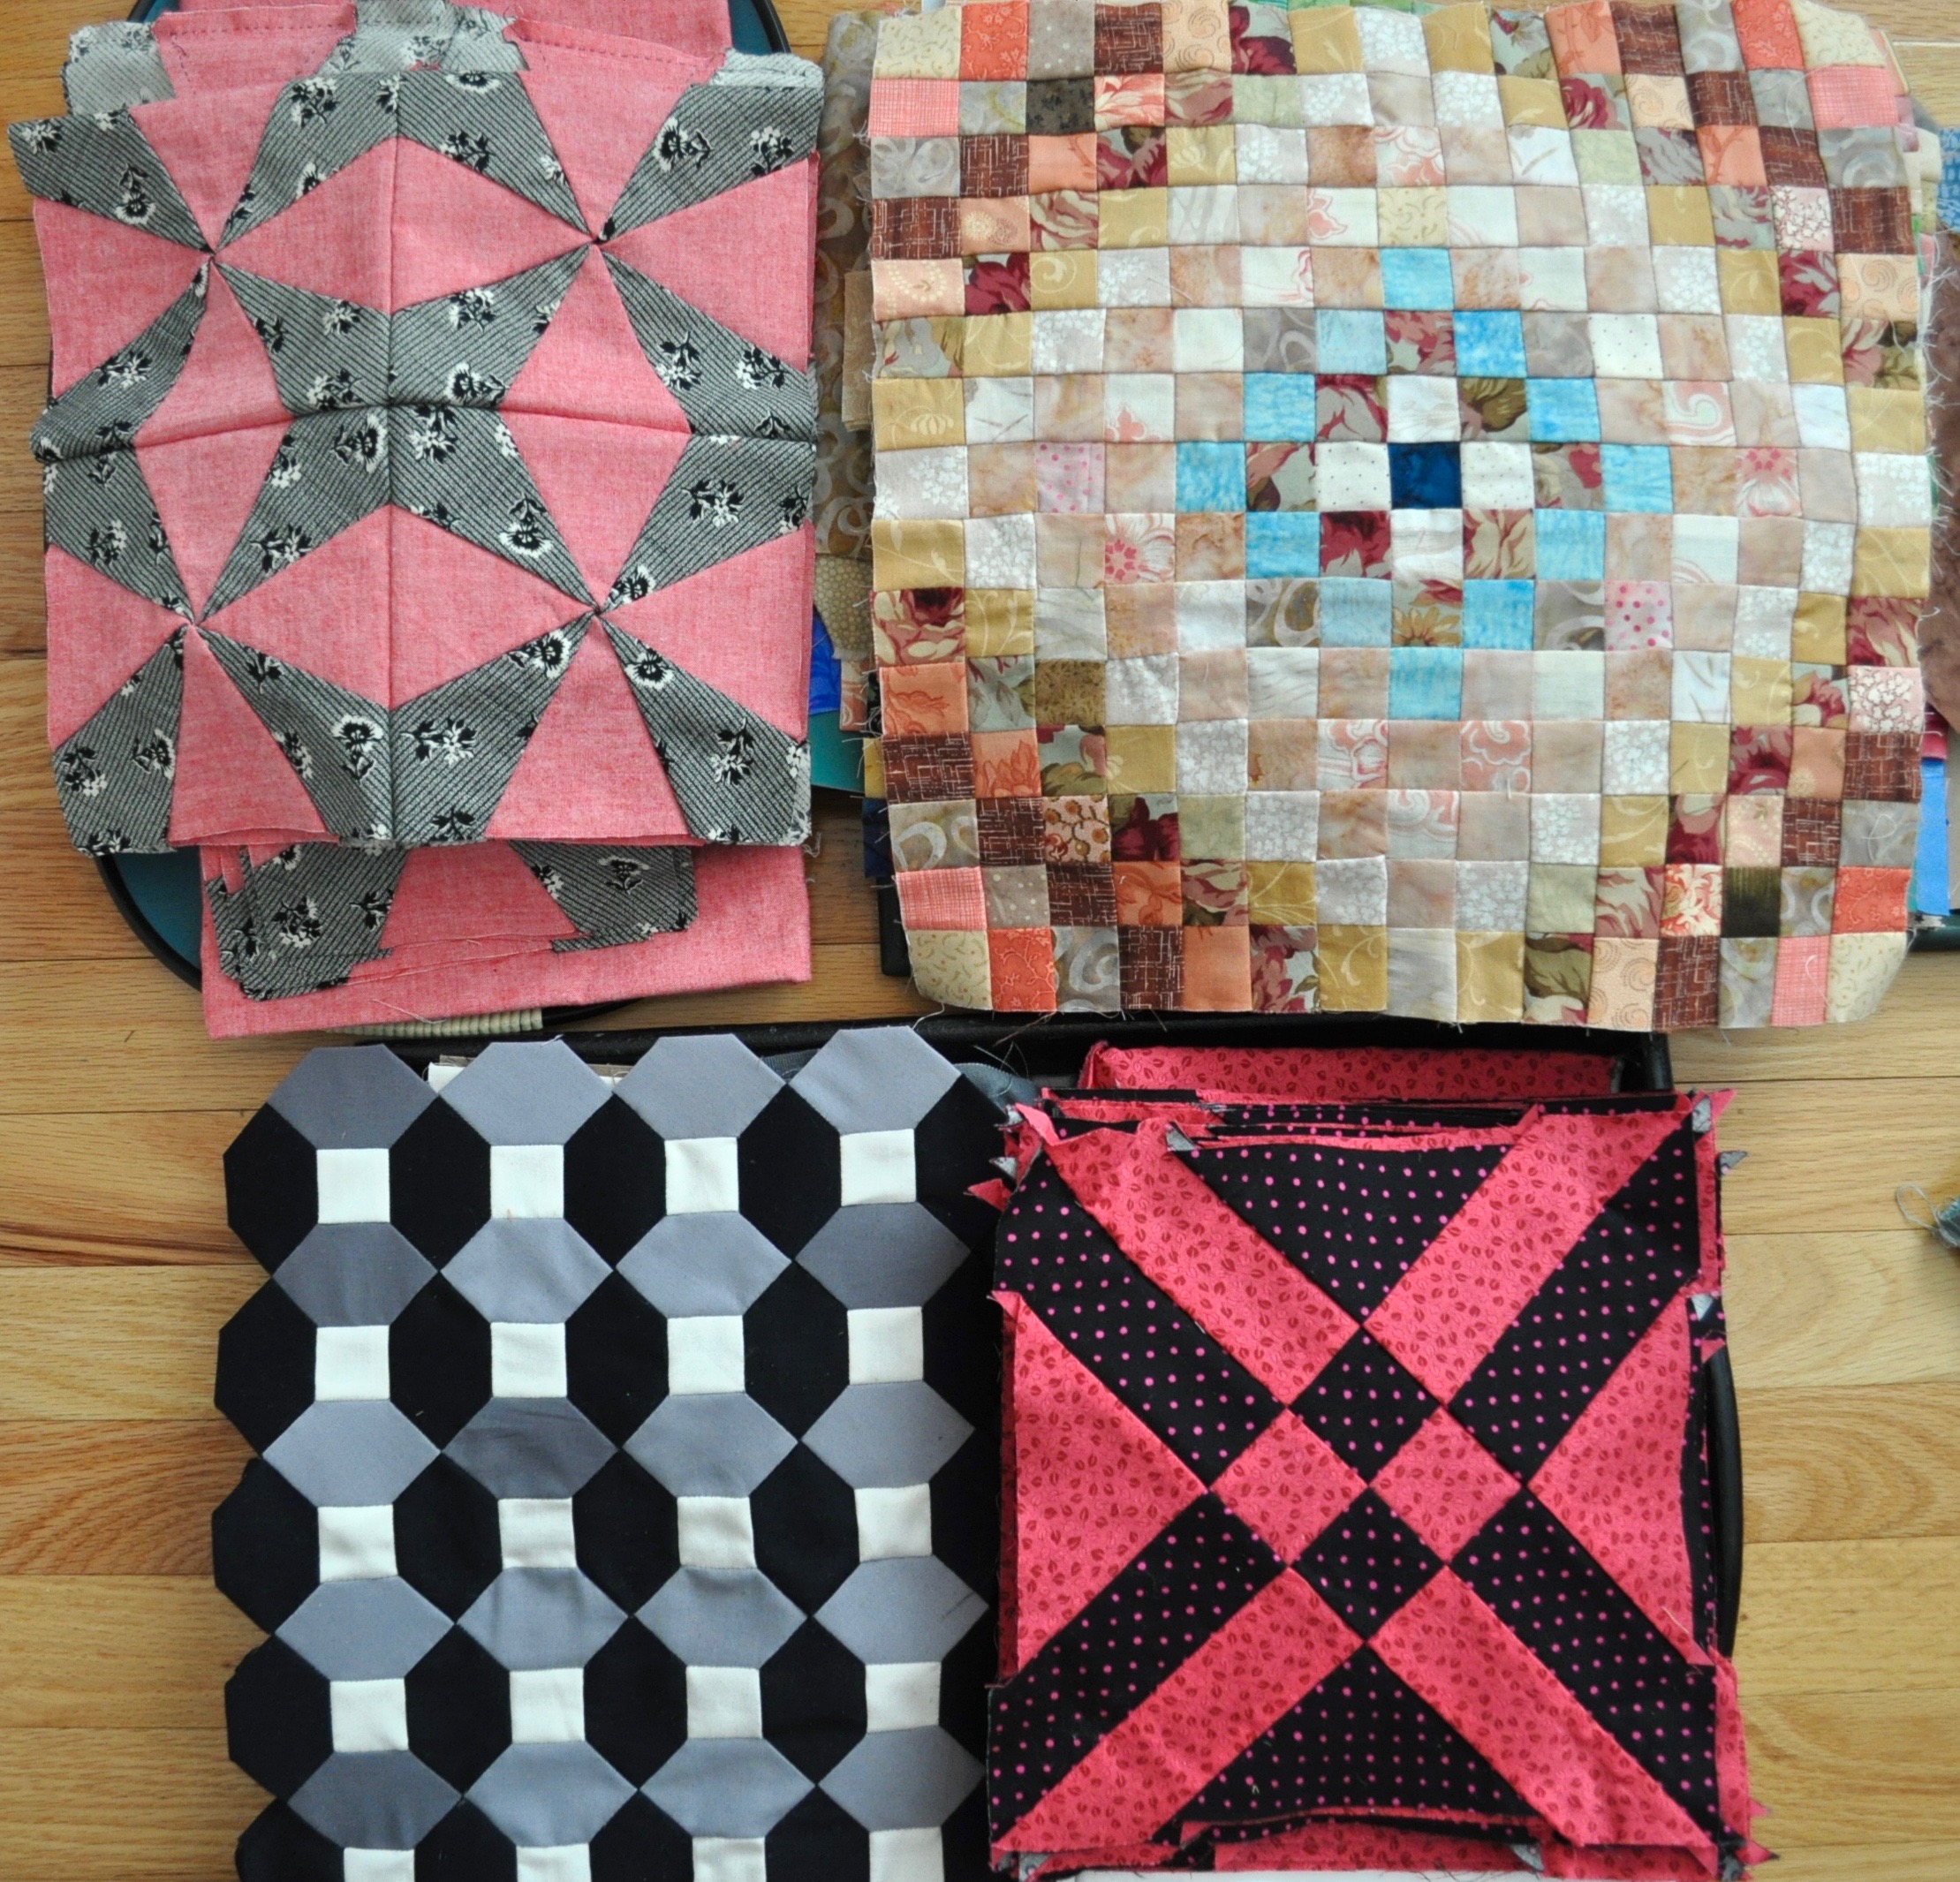
WIPs on trays for portability and easy access.
Lately, I’ve felt compelled to finish my piles of WIPs before I have a chance to add even one more to their numbers. Today, I’m sharing helpful tools for organizing WIPs, and I’m inviting you to share your best tips for completion in the comments below. I’ve also made a place for us to share our WIPs and cheer each other to the finish line: #finishedwips2019. Join in the fun!
If the sheer number of online quilters posing the challenge to finish their WIPs this year is any indication, this just might be the Year Of the WIP! We all have them, and I’ve seen some excellent organizing and planning tools. For printed pages to document and track your WIP progress, Patchwork Posse offers this free set. Also, there’s the Quilter’s Planner. (I’m not paid for endorsing these products, I just appreciate them and want to share.) You can also make your own chart to suit your needs. While I don’t use one, I have a feeling there’s probably an app for this, too!

Arrowhead quilt blocks, machine pieced
Here are four of my WIPs to tackle this year. I’ve made my own tracking page, and I’ve tacked it to my design wall so that it’s always in plain sight. I store my WIPs on trays, uncovered, on a bench in my studio. The portable trays are stored in the open within easy reach of the sewing machine or to take up to my hand sewing nest. I also store the spool(s) of thread, bobbin(s) and any instructions, notes and templates on each tray. It’s all about removing hurdles that could slow my progress.
Any amount of success is going to depend on finding the right storage and organizing methods for you. For example, I know that if I cover my WIPs or store them under a bed, I’ll forget they even exist, let alone where I put them, so I know I need to see them. It’s the same reason why I tack up my progress chart on my design wall. It can’t get misplaced, and it’s in plain sight to remind me to make the most of my sewing time.
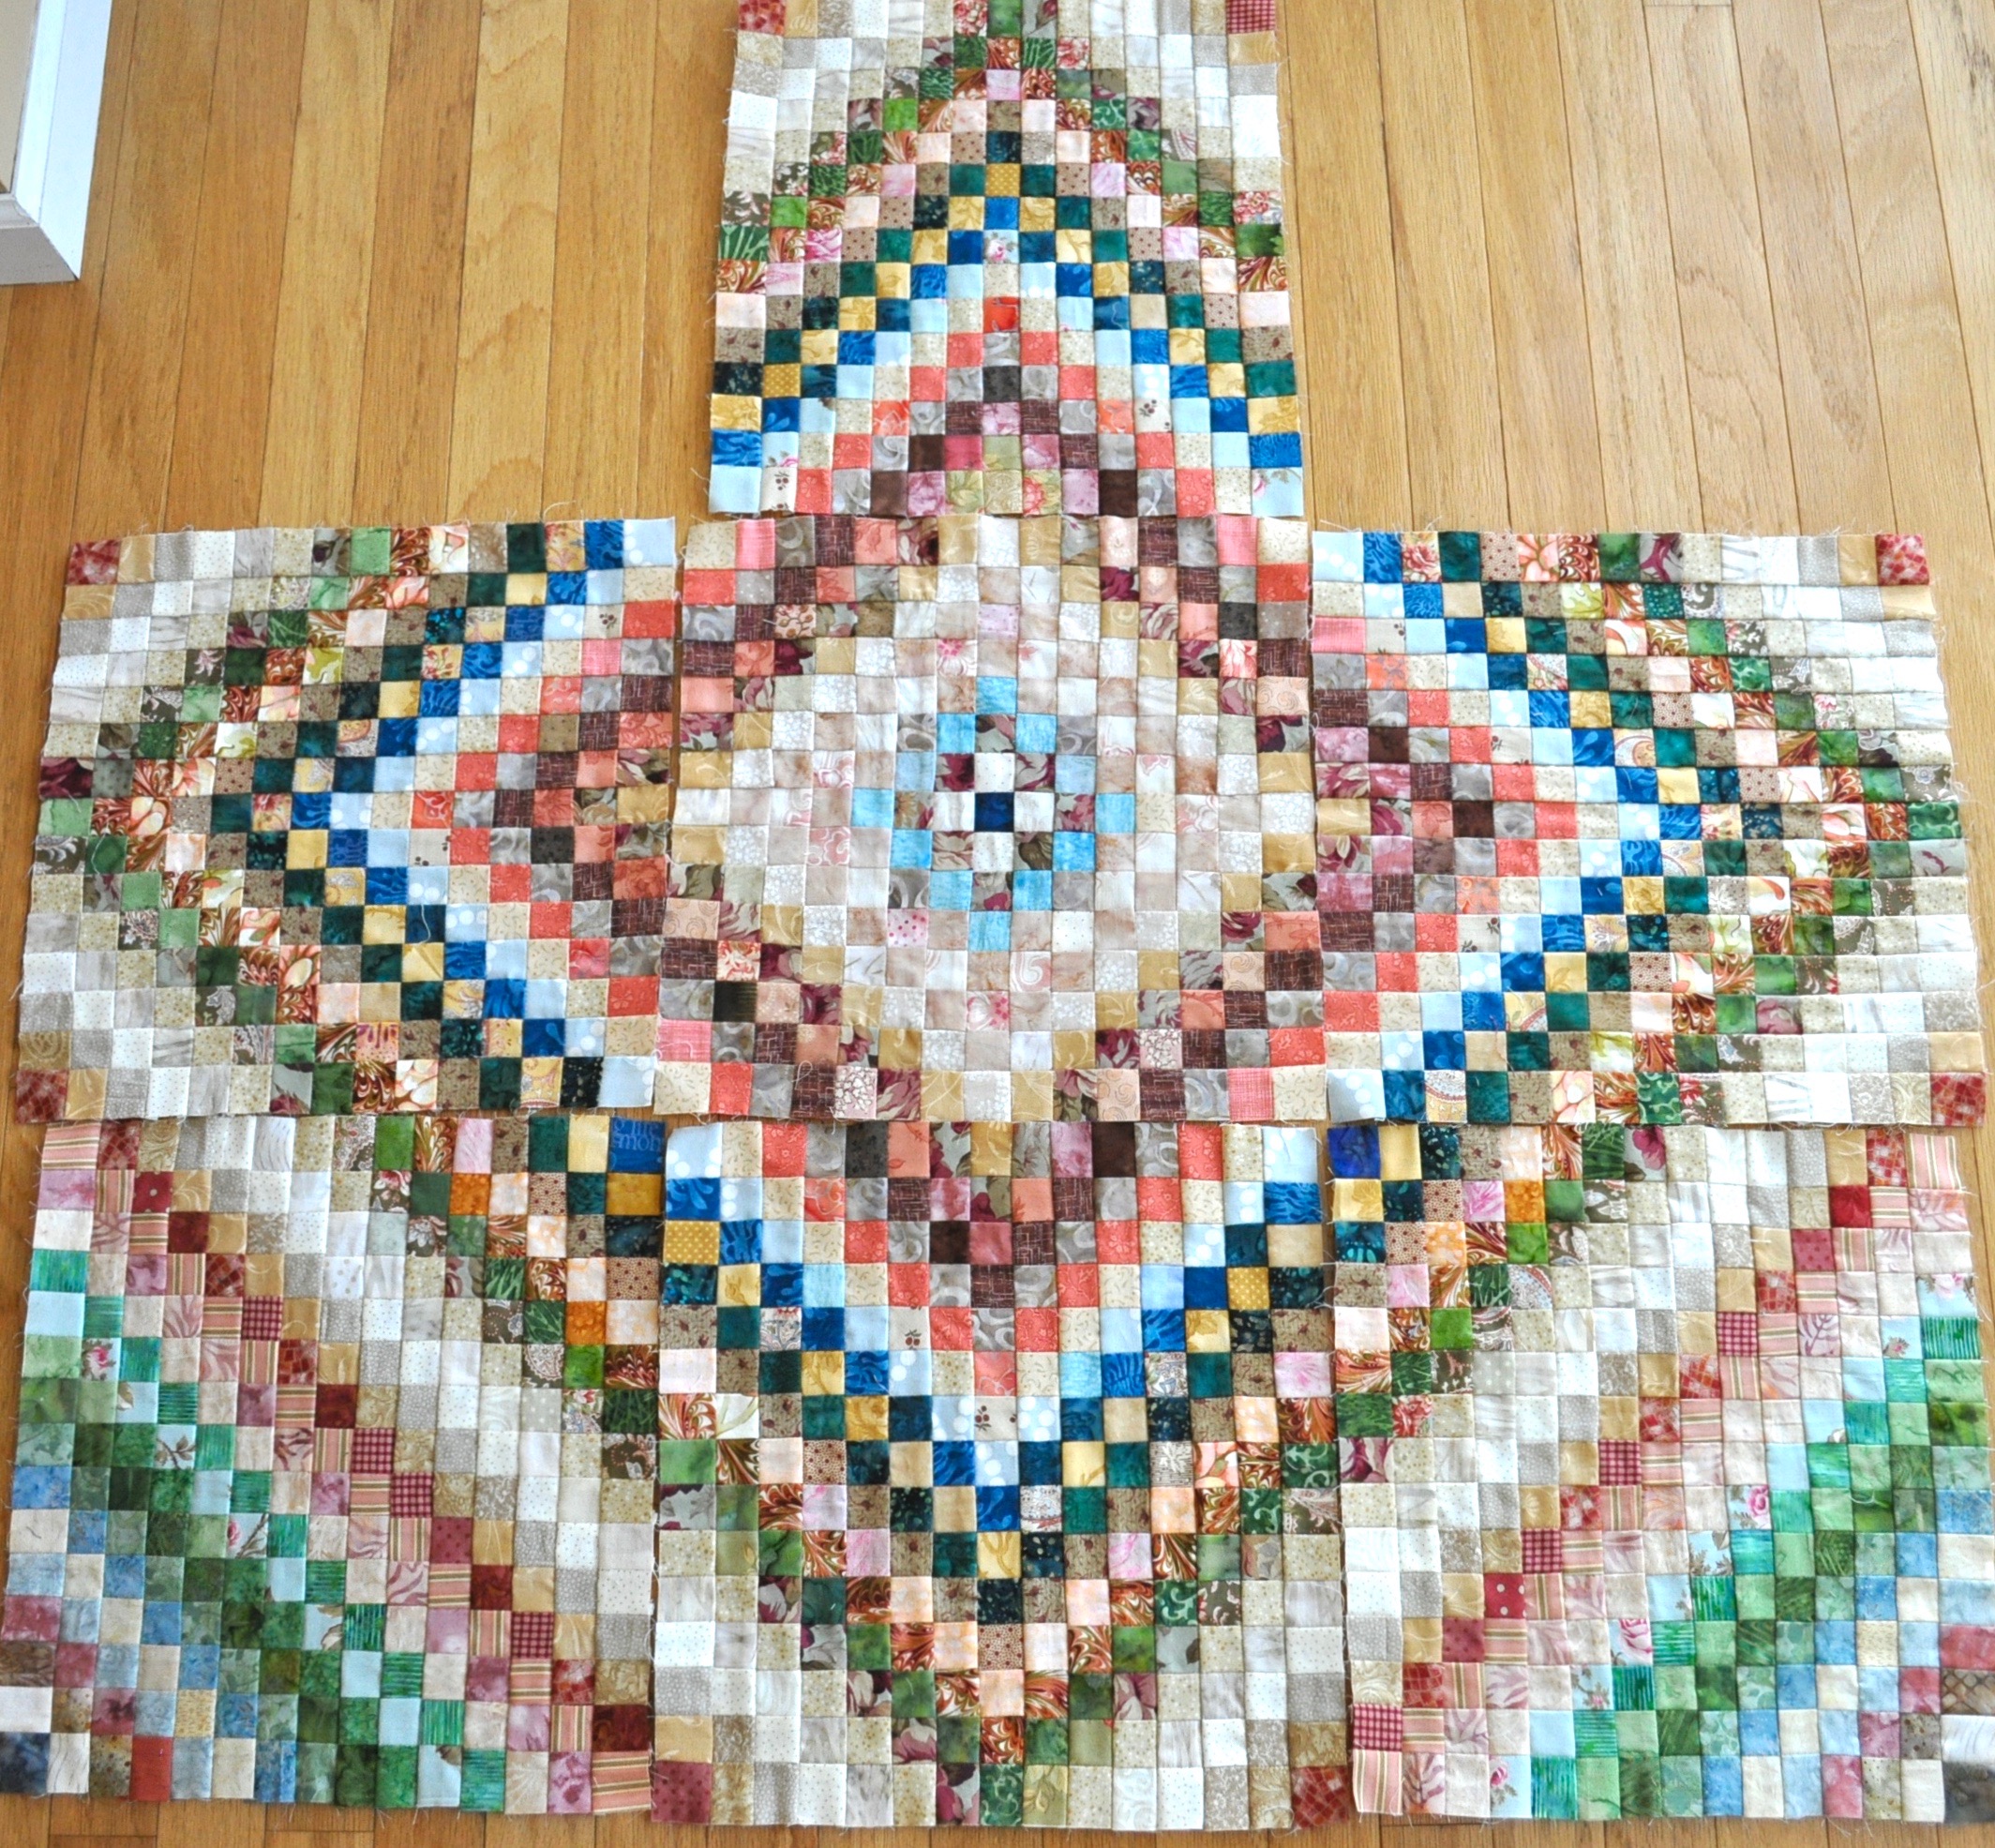
Postage Stamp blocks, individual 1” squares, machine pieced

Antique Stars, hand pieced
My WIPS are a mix of techniques, and these four are my personal quilt projects rather than for my business. They have no deadline, and each was started because I was curious about the technique and the construction process. I like to have a project under way for each sewing method I enjoy, that way, what ever my mood or energy level there’s a project at the ready. I suppose that’s a double-edged sword.
You can see that I have a few methods represented, including machine piecing, hand piecing and English Paper piecing. As far as how each quilt will be quilted, I’ve decided to wait and see what’s best for each as the tops are completed.

My own “Liberty” Stars, English Paper Piecing
My goal for steadily working on these is to try to sew for 30 minutes each morning before my day really gets under way, and then to sew for any amount of time on either Saturdays or Sundays. They say it takes 30 day for a new habit to become routine, so hopefully at the end of the month I’ll have some real progress to share.
Having said that, life happens and I’m not going to beat myself up if any of these are still staring at me from across the room in December; however, in the spirit of the Year Of the WIP, newly organized and with a sewing plan in place, I’m committed to giving it my best shot! How about you?
I’ll share my WIP journey here and on Instagram. Join in: #finishedwips2019! Before you go, in the comments below tell me how many WIPs you have, how you plan to tackle them or what stops you from working on them…after all, there’s safety in numbers!